


How to set up and use Screen Time on iPhone and iPad
19 Dec 2019
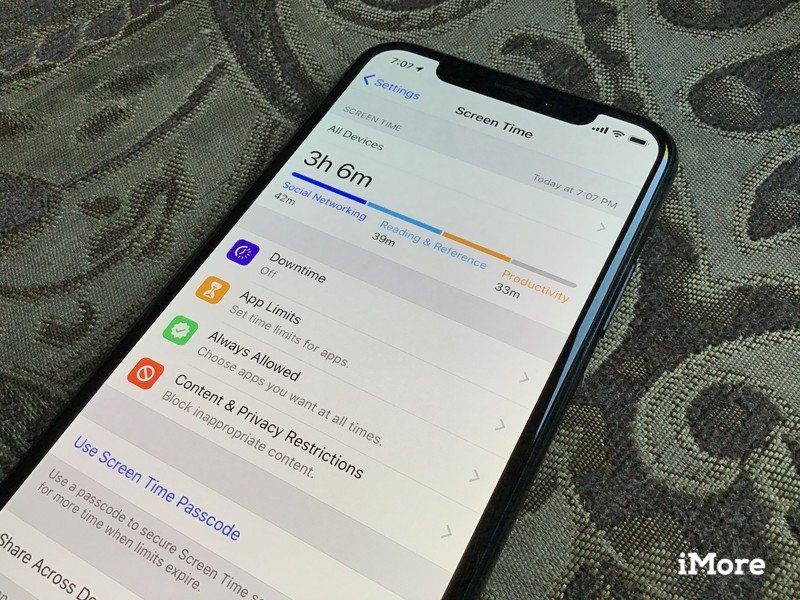
Screen Time is a useful feature in iOS 12 and later that gives you insights on how you use your device. Here’s how to get it set up!
These days, it seems that most of us are glued to our device screens, whether it’s intentional or not. As much as we love our expensive devices, it’s probably best to take a break every now and then, or at least get an idea of just how much time you do spend staring at the screen during the day. Apple added Screen Time as a feature in iOS 12 and later, and it helps you see your device usage over time. Here’s how to set it up and use it.
How to turn on Screen Time
- Launch Settings on your iPhone or iPad.
- Scroll down and tap on Screen Time.
- Tap Turn On Screen Time.
/https%3A%2F%2Fwww.imore.com%2Fsites%2Fimore.com%2Ffiles%2Fstyles%2Flarge%2Fpublic%2Ffield%2Fimage%2F2019%2F06%2Fios-settings-screen-time-turn-on.jpg%3Fitok%3DYkxTw2Fg)
- Tap Continue on the on-screen prompt.
- Select This is My iPhone when prompted if this is your iPhone or your child’s.
/https%3A%2F%2Fwww.imore.com%2Fsites%2Fimore.com%2Ffiles%2Fstyles%2Flarge%2Fpublic%2Ffield%2Fimage%2F2019%2F06%2Fios-settings-screen-time-prompts-enable.jpg%3Fitok%3D8r6wAEWy)
How to set up Screen Time for your child
How to use a Screen Time Passcode
A Screen Time Passcode lets you secure various Screen Time settings, as well as giving you permission for more time when limits expire. This is useful if you want to do something like limit the screen time for someone else’s device.
- Launch Settings on your iPhone or iPad.
- Scroll down and tap on Screen Time.
/https%3A%2F%2Fwww.imore.com%2Fsites%2Fimore.com%2Ffiles%2Fstyles%2Flarge%2Fpublic%2Ffield%2Fimage%2F2019%2F06%2Fios-settings-screen-time.jpg%3Fitok%3DSwpLLFNe)
- Tap Use Screen Time Passcode.
- Input a 4-digit passcode of your choice.
- Re-enter the passcode.
/https%3A%2F%2Fwww.imore.com%2Fsites%2Fimore.com%2Ffiles%2Fstyles%2Flarge%2Fpublic%2Ffield%2Fimage%2F2019%2F06%2Fios-settings-screen-time-passcode.jpg%3Fitok%3DA7cWhBJd)
If you want to change the passcode or turn the passcode off, do the following:
- Launch Settings on your iPhone or iPad.
- Scroll down and tap on Screen Time.
- Tap Change Screen Time Passcode.
- Choose whether you want to Change Screen Time Passcode or Turn Off Screen Time Passcode from the menu.
- Input your passcode when prompted.
/https%3A%2F%2Fwww.imore.com%2Fsites%2Fimore.com%2Ffiles%2Fstyles%2Flarge%2Fpublic%2Ffield%2Fimage%2F2019%2F06%2Fios-settings-screen-time-passcode-change-off.jpg%3Fitok%3D9Bn9vQUd)
How to combine Screen Time on multiple devices
If you have multiple iPhones, iPads, and iPod touches, you can combine the screen time for all of these devices into a single, comprehensive report.
- Launch Settings on your iPhone or iPad.
- Scroll down and tap on Screen Time.
- Toggle the switch for Share Across Devices to ON (green).
/https%3A%2F%2Fwww.imore.com%2Fsites%2Fimore.com%2Ffiles%2Fstyles%2Flarge%2Fpublic%2Ffield%2Fimage%2F2019%2F06%2Fios-settings-screen-time-combine-all-devices.jpg%3Fitok%3D_aO8zZLK)
When this is enabled on each device, as long as you’re logged in to the same iCloud account, all of your screen time will be combined.
How to set up Downtime
Downtime lets you schedule time away from the screen. However, you can choose to let certain apps be used during Downtime, and phone calls will still be available.
- Launch Settings on your iPhone or iPad.
- Scroll down and tap on Screen Time.
- Tap on Downtime.
/https%3A%2F%2Fwww.imore.com%2Fsites%2Fimore.com%2Ffiles%2Fstyles%2Flarge%2Fpublic%2Ffield%2Fimage%2F2019%2F06%2Fios-settings-screentime-downtime.jpg%3Fitok%3DMFXwuNCN)
- Turn the toggle to ON.
- Select what days you want Downtime to occur on: Every Day or Customize Days.
- Select your From and To times.
/https%3A%2F%2Fwww.imore.com%2Fsites%2Fimore.com%2Ffiles%2Fstyles%2Flarge%2Fpublic%2Ffield%2Fimage%2F2019%2F06%2Fios-settings-screentime-downtime-settings.jpg%3Fitok%3DPJRtuKul)
How to set up App Limits
App Limits allow you to set time limits for specific apps. Need to cut down on that wasted time on Facebook or Twitter? This is what you would use.
- Launch Settings on your iPhone or iPad.
- Scroll down and tap on Screen Time.
- Tap on App Limits.
/https%3A%2F%2Fwww.imore.com%2Fsites%2Fimore.com%2Ffiles%2Fstyles%2Flarge%2Fpublic%2Ffield%2Fimage%2F2019%2F06%2Fios-settings-screen-time-app-limits.jpg%3Fitok%3DGQFCj1uB)
- Tap Add Limit.
- Choose what categories you want to apply the limit to.
- Unfortunately, in iOS 12, you can’t pick-and-choose specific apps to limit. This is a broad rule that will be applied to all current and future apps within your specified category.
/https%3A%2F%2Fwww.imore.com%2Fsites%2Fimore.com%2Ffiles%2Fstyles%2Flarge%2Fpublic%2Ffield%2Fimage%2F2019%2F06%2Fios-settings-screen-time-app-limits-categories-next.jpg%3Fitok%3DOQxbp2Z6)
- Tap Next.
- Select how much time to allot for all apps in your selected categories.
- Select the Days that this rule applies to.
- Tap on Add to save your limits.
/https%3A%2F%2Fwww.imore.com%2Fsites%2Fimore.com%2Ffiles%2Fstyles%2Flarge%2Fpublic%2Ffield%2Fimage%2F2019%2F06%2Fios-settings-screen-time-app-limits-settings.jpg%3Fitok%3DuFk1LEOP)
In iOS 13, you will be able to tap on an arrow for each category and choose specific apps to which you want to apply limits.
/https%3A%2F%2Fwww.imore.com%2Fsites%2Fimore.com%2Ffiles%2Fstyles%2Flarge%2Fpublic%2Ffield%2Fimage%2F2019%2F06%2Fios13-screen-time-app-limits-individual.jpg%3Fitok%3DvGwB3Xd3)
This option is useful, but it can be a bit tedious if you’re going to pick-and-choose from a lot of apps. This method would work best if you don’t have a lot of apps installed to begin with.
How to set up Always Allowed Apps
Sometimes you will want certain apps to always be available to access, regardless of any limits you’ve imposed.
- Launch Settings on your iPhone or iPad.
- Scroll down and tap on Screen Time.
- Tap on Always Allowed.
/https%3A%2F%2Fwww.imore.com%2Fsites%2Fimore.com%2Ffiles%2Fstyles%2Flarge%2Fpublic%2Ffield%2Fimage%2F2019%2F06%2Fios-settings-screen-time-always-allowed.jpg%3Fitok%3D-BWbdD_H)
- Tap on the green + button on any app that you want to make always available.
- Tap on the red – button on any apps you want to limit if they fall into a limited category.
/https%3A%2F%2Fwww.imore.com%2Fsites%2Fimore.com%2Ffiles%2Fstyles%2Flarge%2Fpublic%2Ffield%2Fimage%2F2019%2F06%2Fios-settings-screen-time-always-allowed-apps.jpg%3Fitok%3DBoctcMPM)
How to set up Content & Privacy Restrictions
If you want to block inappropriate content from showing up on the device, you must do it from Screen Time.
- Launch Settings on your iPhone or iPad.
- Scroll down and tap on Screen Time.
- Tap on Content & Privacy Restrictions.
/https%3A%2F%2Fwww.imore.com%2Fsites%2Fimore.com%2Ffiles%2Fstyles%2Flarge%2Fpublic%2Ffield%2Fimage%2F2019%2F06%2Fios-settings-screent-time-content-privacy.jpg%3Fitok%3DpX7eo0x1)
- Tap the toggle to ON.
- Tap on the option that you want to change.
/https%3A%2F%2Fwww.imore.com%2Fsites%2Fimore.com%2Ffiles%2Fstyles%2Flarge%2Fpublic%2Ffield%2Fimage%2F2019%2F06%2Fios-settings-screen-time-content-privacy.jpg%3Fitok%3DTa54RKrV)
- Select Allow Changes or Don’t Allow Changes.
- Toggle individual settings as you see fit.
/https%3A%2F%2Fwww.imore.com%2Fsites%2Fimore.com%2Ffiles%2Fstyles%2Flarge%2Fpublic%2Ffield%2Fimage%2F2019%2F06%2Fios-settings-screen-time-privacy-content-options.jpg%3Fitok%3DObZE-IUl)
How to set up Communication Limits in iOS 13
In iOS 13, there is a new Screen Time setting that lets you apply limits to communicating with others through Phone, FaceTime, Messages, and AirDrop. These settings limit you on who you can communicate with during allowed screen time and downtime when enabled.
- Launch Settings on your iPhone or iPad.
- Scroll down and tap on Screen Time.
- Tap on Communication Limits.
/https%3A%2F%2Fwww.imore.com%2Fsites%2Fimore.com%2Ffiles%2Fstyles%2Flarge%2Fpublic%2Ffield%2Fimage%2F2019%2F06%2Fios13-settings-screen-time-communication-limits.jpg%3Fitok%3DvgBv8DZU)
- Choose your setting for During Allowed Screen Time.
- The options include: Everyone or Contacts Only.
- You can also toggle Allow Introductions in Groups. This means people can be added to group conversations only when one of your contacts or a family member (if Family Sharing is enabled) is in the group.
/https%3A%2F%2Fwww.imore.com%2Fsites%2Fimore.com%2Ffiles%2Fstyles%2Flarge%2Fpublic%2Ffield%2Fimage%2F2019%2F06%2Fios13-screen-time-communication-allow-time.jpg%3Fitok%3DAaW5mr4L)
- Choose your setting for During Downtime, which is either Everyone or Specific Contacts.
- If you chose Specific Contacts, tap Add Contacts.
- Select the method from which you want to choose a contact from: Choose From My Contacts, Choose From x name’sContacts (if Family Sharing is enabled), or Add New Contact.
/https%3A%2F%2Fwww.imore.com%2Fsites%2Fimore.com%2Ffiles%2Fstyles%2Flarge%2Fpublic%2Ffield%2Fimage%2F2019%2F06%2Fios13-screen-time-communication-limits-downtime.jpg%3Fitok%3DNpkQBfdB)
How to turn off Screen Time
If you’re tired of seeing how much time you’re wasting on your phone, or if you feel like your battery life is worse because of Screen Time, then you can simply turn it off.
- Launch Settings on your iPhone or iPad.
- Scroll down and tap on Screen Time.
- Tap on Turn Off Screen Time.
/https%3A%2F%2Fwww.imore.com%2Fsites%2Fimore.com%2Ffiles%2Fstyles%2Flarge%2Fpublic%2Ffield%2Fimage%2F2019%2F06%2Fios-settings-screen-time-off.jpg%3Fitok%3DlzpwLnzx)